Hopefully you will enjoy my blog about hunting, fishing, the outdoors, and my artsy-fartsi-ness.
Thanks for visiting.
Showing posts with label rustic. Show all posts

Sunday, April 12, 2015

Coat Rack Straight From The Beach!

This project was done by Another Crafty woman named Sarah Sergent.  It looks so beautiful hanging in her home and besides her more expensive taste in coat hooks, this is a very affordable if not free project that can be done.

This could nearly be a free project.  This is a piece of driftwood from Lake Huron on the Tawas Bay.

This is Sarah picking up and carrying the large piece of driftwood from the beach near a shipwreck that occurred in the late 1800's
She chose to buy the coat hooks from Home Depot.  She paid $4.00 for each hook.  It looks beautiful.  (if you wanted to go cheaper or free, you could use large nails or screws just as well)  So her investment in this project is approximately $25.00


Beçk¥

Decorative Rustic Wall Rack

This project was a birthday gift for my sister from her son.  I really had him do as much as he could, and he was very proud of his work.
This project consisted of 6 pallet boards that I cut into different sizes to give it a puzzle look instead of a brick stagger look.  The flat sheet of wood is what we screwed each pallet board onto and attached large hooks on the back.

My nephew made the pattern he was happy with on the flat board and we screwed all the pallet pieces to it.  This is him sanding the edges nice and smooth.

He chose to stain each board a different color to give it a more rustic look.  He also decided the pattern of the stain being applied as well.  The stain colors are Oak, Driftwood, Kona, and clear.  I know staining all the boards would be easier to do when it is taken apart, but this was his project and he felt happy doing it this way.


After the stain was dry he chose a color of paint (a teal green) and decided to paint some arrows on it.  His family is a very active outdoor family so this was something that would go well in their home.


We decided to attach a couple extra Whitetail antlers that I had so items can be hung from them.  This photo is just an idea of how she can decorate it in her home.  Hopefully she will send me a picture of it decorated how she likes and I will post it below.

My nephew was very proud of his work, and did a great job.


Beçk¥

Sunday, October 19, 2014

Husband and Wife deer skulls.

For this project we found two skulls while out shed hunting.  One was a doe and one was a buck skull that had already naturally shed its antlers, but still neat.  I soaked them in clean water and peroxide for a few hours to clean them up.  They were old and had been dead for a long time, they were already dried out.

To mount the heads I had some scrap wood in my barn so I stained it a drove a 2 inch screw through the backside, so the skull can hang on the protruding part of the screw.  The back of the skull of the deer has a deep hole where the brain would've been so the screw slides into it perfectly.


This is the buck one  up close.  I added some small metal decorative corners to the wood

Here is the finished product with a small latch on the back to be hung on the wall. They are neat conversation pieces, and they were found while out shed hunting with our children.

Monday, June 24, 2013

Tongue and Groove Project


Finished Project, I love that my wax warmer illuminates the deer at night.

I started with tongue and Groove boards
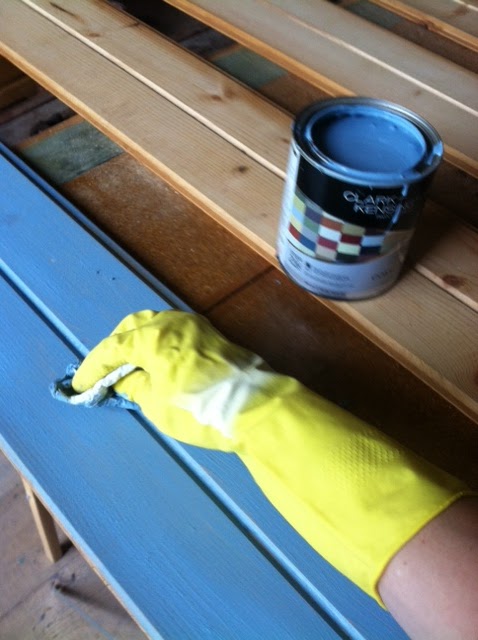
I got all my paint for free from a few weekends of free quartz of painted being given away at Ace Hardware.  I just rubbed the paint on with a paper towel.  


After I painted each slat, I put them together, and sanded all the edges and some of the front.  Then I found a stencil I liked and used my projection machine to blow up the image an the boards.  You can barely see that I traced a deer onto it in this photo.
This is me painting the deer in black.

This is the finished product.  Price:  Free.  Slats were givin to me for free, the colored paint was free from the hardware.  Win win for me!

Thanks,
ßeçk¥


Monday, December 10, 2012

Shotgun Shell Mirror!

I made this large mirror into a shotgun shell framed mirror.  I found this mirror on the side of the road with someone's trash.  It was covered in soot like it had been smoke damaged in a fire.  I washed it clean, it has no smell, I put a fresh coat of varnish on it to seal it, and decided to hang on to it for a project.....well, the project has arose!

The mirror I used.


I only used shells with the gold bottoms, I hot glued them gold end to the inside,
This is the finished product hanging on the wall.  Turned out awesome!


ßeçk¥


Shotgun Shell Wreath

I saw this wreath on pinterest so I thought I would take a "shot" at it and make one myself rather then pay the $99.00 dollars that they are asking for theirs.  


First I hot glued about two hundred shells together by gluing two inch string from the inside of one empty shell to the other empty shell.  Make about two hundred sets like this.


I bought a wreath frame from Michaels (around $3.00), I looped each shell through the middle and dangled a set over the inside and again over the outside of the frame.

You can see the frame has four frame wires.  I hot glued the strings into place so when I lifted it to hang it everything didn't slide downward.

This is the backside of it.  I also tied a ton of little tweed type bows around the inside and outside to hide any green frame from showing, but to also give it a bit more of a rustic look.
I hung it on a wall for display.  You can see from gluing the shells in place all the shells stay in place all the way around pretty evenly and you can see the tweed string a bit throughout the inside and outside.  I finished it with a Burlap bow.  I really like it.  I suppose you could wind some lights into it if you want, I kept it pretty simple.

Thank You for checking it out.
ßeçk¥